In the article, we will take a look at how we can automate the process of importing Contacts from an Excel file to a BitFaster Group using a BitFaster Alert. It is assumed that you have already updated the Customer ID and Pin in the Options window. If you don't have this information, please
contact us to get a trial account.
The example will use 7 fields that will be mapped to the Contact_Master table in BitFaster. We will need to make a note of the Group ID to which we will have to import the data (make sure the Groups are created in BitFaster before you start).
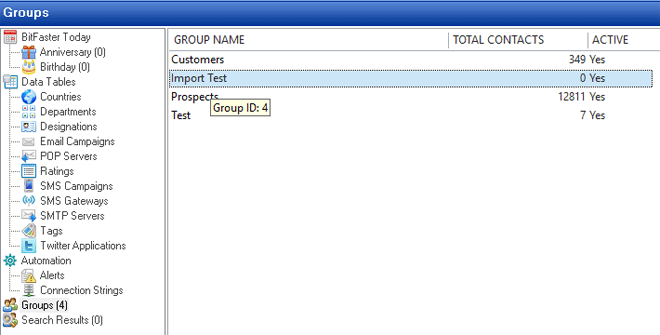
View Group ID on Mouse Over
We will import the Contacts to the group named "Import Test" which has an ID 4. The sample data is shown below with the first row as Column Headers:

Sample Excel Data
Now that we have our import data ready, let's create a Connection String (from File > New > Connection String) which tells BitFaster details about the Excel file we should connect to (make sure the Excel file is closed before you do this). You will need to change the file name and path after "Data Source" to suit your requirements. Click on the Test button to make sure there are no errors and then Add the Connection String.
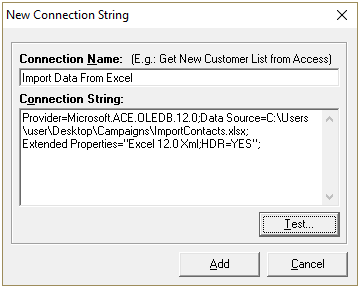
New Connection String to Excel file
Also make sure you create a Connection String for the BitFaster Database (check for the path in "Data Source" to suit your requirements). Click on the Test button to make sure there are no errors and then Add the Connection String.
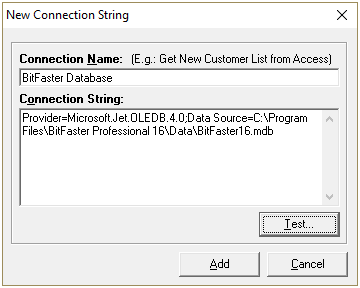
New Connection String to BitFaster Database
You are now set to create an Alert. From the File menu choose New and then click on Alert. Under the Details tab, choose Data Transformation. Comments are optional.
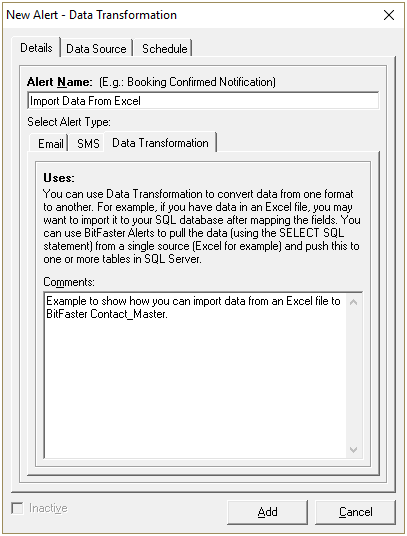
Create New Alert - Step 1
Now click on the Data Source tab, pick the Connection String from the drop down menu and then enter the SQL Statement as shown in the screenshot below. Replace Sheet1$ with the name of the Excel Sheet in case you have renamed it in Excel.
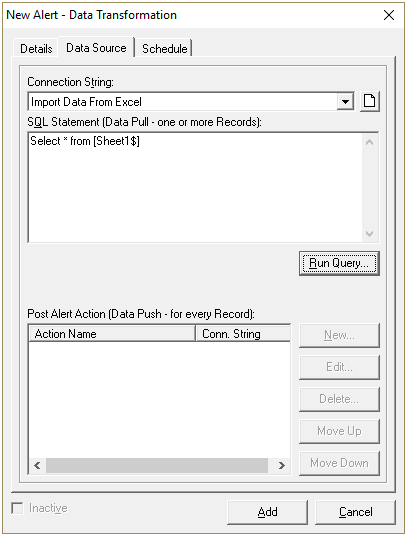
Create New Alert - Step 2
Now you have to click on the Run Query button. You should see all your data from the Excel file as below.
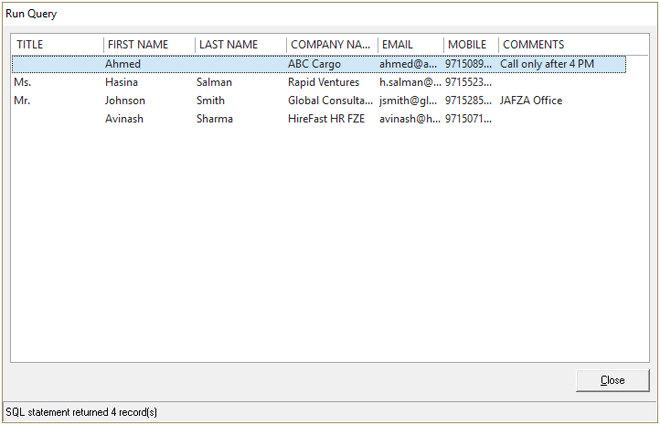
Run Query
The last step is to specify a Schedule. This tells BitFaster as to when it should execute the Alert. You can run the Alert once a day or at regular intervals (like every 5 minutes) as required.
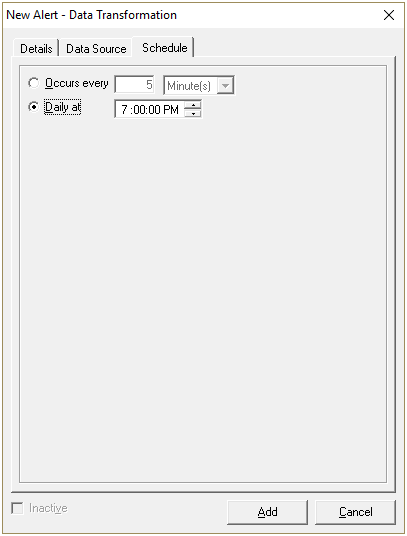
Create New Alert - Step 3
Now click on the Add button to create the Alert. So far we have seen how we can read the records from Excel. We will now see how we can insert this data into the Contact_Master table in BitFaster.
Now double click on the Alert name (in the BitFaster main window tree view click on Alerts under Automation) to edit it. In the Edit window, choose the Data Source tab and then click on the New button under Post Alert Action.
Make sure you choose the Connection String for the BitFaster database from the drop down and enter the SQL statement as shown below. All field values are enclosed in square brackets. Field names should be in all CAPS.
Insert into contact_master (salutation, firstname, lastname, company, defaultemail, defaultmobileno, comments, groupid) values ('[TITLE]', '[FIRST NAME]', '[LAST NAME]', '[COMPANY NAME]', '[EMAIL]', '[MOBILE]', '[COMMENTS]', 4 )
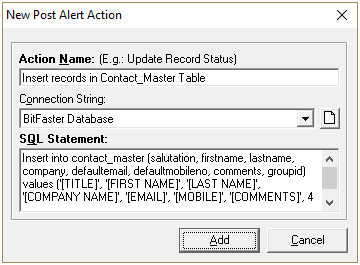
New Post Alert Action
Click on the Add button to create the Post Alert Action. You can have BitFaster execute multiple Post Alert Actions by adding more and then sequencing them as per your requirement. You are now ready to run the Alerts Manager. It is accessible from Tools > Alerts Manager.
BitFaster runs the Alerts based on your configuration. The Alerts Manager is updated every second to reflect the latest status.
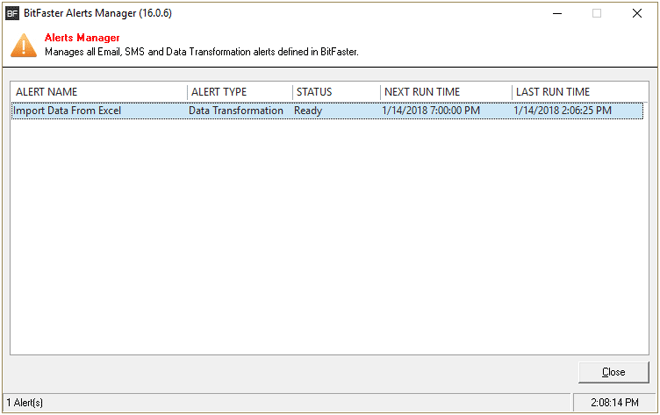
Alerts Manager
Once the Alert is executed, you can check the Contact_Master table in BitFaster to verify if the records have been added as shown below:

Contacts Imported


